


The other day I was using the stringer aid to install a new string on the Micro 355. Wanted to wax the string.
I placed the stinger aid on and clipped on the cocking aid. Yarding back on the cocking aid I felt instant resistance well shy of cocking and immediately the arrow hold down spring hit the floor, slightly bent with screws held in by a thin rubber pad. Screws had a little metal (and I mean a little) on them.
What happened was I failed to notice that the stinger aid did not go under the hold down spring and the stinger then went between the scope rail and the hold down spring. The force of the action plus the lack of screw engagement caused the failure. Although the fault is mine for not paying attention and expecting the stringer aid to go under, it revealed a shortcoming by not doing it right.
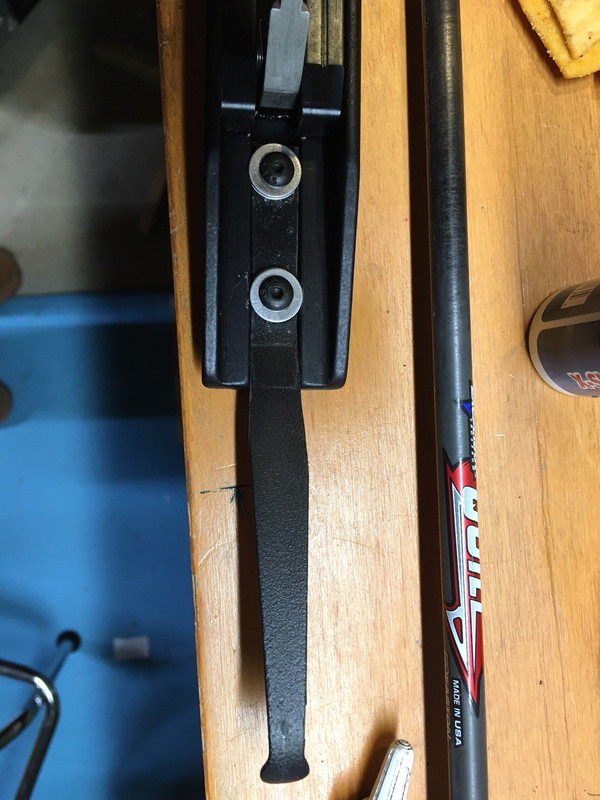
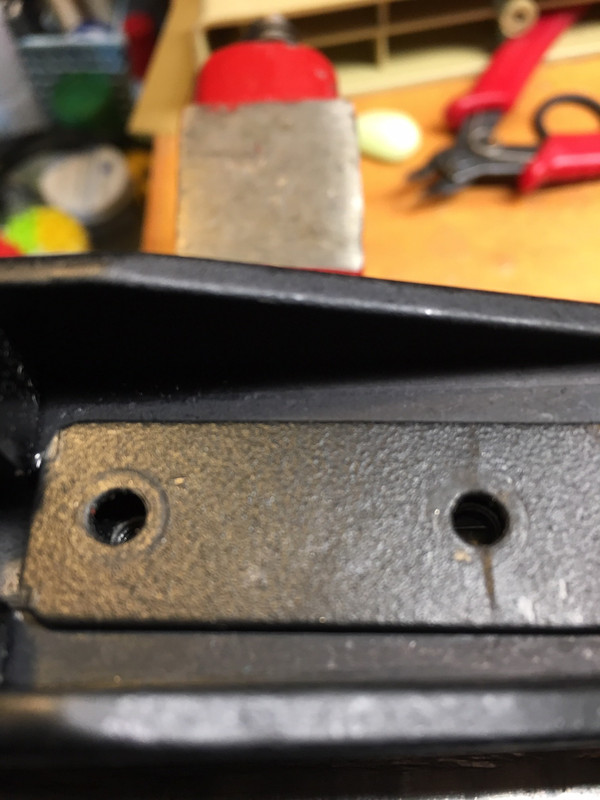
The hold down spring is riding bottom of the rail. The screws go in from this side. There is a rubber pad that goes between the hold down spring and the rail, further extending the distance and thus limiting screw engagement.
There is a slot on the underside of the rail which could easily be employed and would allow for better screw depth.
In the following photo, you can see the thread length measurement and the distance from the bottom of the hold down spring plate to the rail is .02 mm under the screw length.
I decided I would utilize the rail slot which would facilitate better hold down spring anchoring. This would mean narrowing the hold down spring the the area of engagement.
First I measured the slot which was 11 mm. I marked hole center and then measured out 5.25 mm on each side of that to establish the line of material that I needed to remove. This was .25 mm. I found that I had to remove slightly more to make the fit. I cut the rubber pad (shim) to fit and reuse it. Along with a couple of aluminium washers (the ones used for backing rivets) for each screw I proceeded to remount the hold down spring. I trimmed 2 of the washers on each side so that they could fit inside the rail slot with the other on top. The fit was right on so I pulled the screws one at a time, applied some green lock-tite and back in they went. Torqued to 12 in/lb. Remounted rail to crossbow and scope to rail and good to go. Will have to see how much it's off target.
The finished look. Make sure that there is enough tension on the arrow before going to completed point.


 Reply With Quote